Online Banking | How to Use
How to change your username or password
Reset your password or retrieve your username:
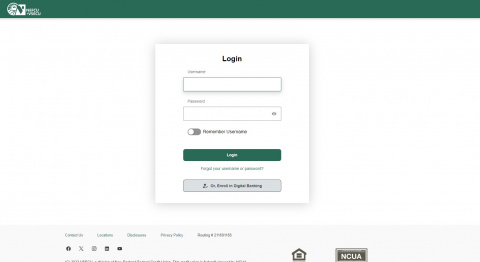
- If you have forgotten your username or your password, click on Forgot your username or password?
- If you have forgotten your password, select Personal Account, enter Username and Date of Birth, click Reset Password and follow the prompts.
- If you have forgotten your username, enter either your primary Email Address or Phone Number. Click Send to have your username sent to you.
*Note: Once you receive your username, you may go through the Reset Password process if you have also forgotten your password.
Still have questions? Download our complete user guide.
Change your username or password:
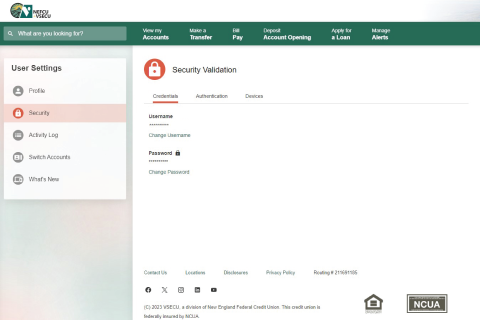
- If you know your username and password but wish to change either one or both, log into Digital Banking.
- Click your profile icon to access user settings.
- Click Security.
- At the ID & Password tab, select Change Username or Change Password and follow the prompts.
Username and password criteria:
Username: Must be 8-32 characters long and cannot include special characters
(!, $, *, etc.)
Password: Must be 8-32 characters long, contain at least one upper case letter and one number, and can include special characters (!, &, %, etc.)
Still have questions? Download our complete user guide.
How to add an account from another institution
Add an account via instant verification:
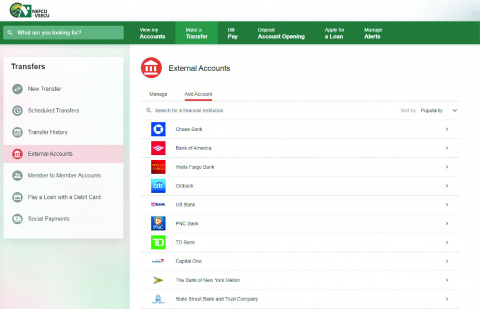
- Log into Digital Banking and click Make a Transfer.
- From New Transfer, click Add External Account. Alternatively, from External Accounts, click Add Account.
- From the drop-down menu, choose a Delivery Method for your validation code and click Request Code.
- Enter the code you received in the Verification Code field and click Next.
- Read and agree to the External Transfer Service Agreement, then click Next.
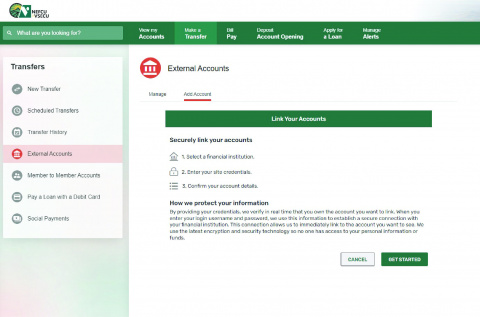
- Click Get Started to securely link your accounts by Instant Account Verification.
- Search for your financial institution or select it from the list. If you can’t find your institution, you may click Click here at the bottom of the screen to connect your account manually (see next section).
- Enter your login credentials and click Submit.
- Choose a verification method and click Submit. Note: Multi-factor authentication steps may differ by institution.
- Enter your verification code and click Submit.
- If you have multiple accounts, select one or more with the toggle switch and click Submit.
- Click Save (when choosing from among multiple accounts) or Done at Verification Success.
Still have questions? Download our complete user guide.
Add an account manually:
- Log into Digital Banking and click Make a Transfer.
- From New Transfer, click Add External Account. Alternatively, from External Accounts, click Add Account.
- From the drop-down menu, choose a Delivery Method for your validation code and click Request Code.
- Enter the code you received in the Verification Code field and click Next.
- Read and agree to the External Transfer Service Agreement, then click Next.
- Click Get Started to Link Your Accounts.
- At the bottom of the Select Institution screen, click Click here to connect your account manually.
- Search for your financial institution or select it from the list. Click I can’t locate my financial institution if you can’t find your financial institution using the search function.
- Add External Account Details.
- Enter the Routing Number of your financial institution.
- Edit or enter an Account Nickname.
- Enter and confirm your Account Number.
- Select Account Type.
- Click Connect.
- Check your external account for two small trial deposits (which may take up to three business days to show), then return to Digital Banking and enter the deposit amounts to complete the verification process.
- Log in to Digital Banking. Click Make a New Transfer, then select External Accounts.
- Click Verify next to the external account you would like to verify.
- Enter the two small trial deposit amounts in the Deposit Amount 1 and Deposit Amount 2 fields.
- Click Verify Account.
Still have questions? Download our complete user guide.
How to make a wire transfer
- Log in to Digital Banking and click the three-dot ellipsis (…) to access More Links.
- From the More Links drop-down menu, click on Wires.
- Enter One Time Wire details.
- Select the Funding Account from the drop-down menu.
- Enter the Amount of the wire transfer.
- The wire transfer Occurs once.
- Choose the Deliver By date.
- Select the Type of wire from the drop-down menu.
- Enter One Time Wire details, continued: Enter Beneficiary Info. Note: The abbreviation FI stands for Financial Institution.
- Beneficiary Name
- Account Number
- Address (optional)
- Beneficiary FI Routing Number
- Beneficiary FI Name
- Message to Beneficiary (optional)
- Click Review.
- Review One Time Wire details. Click Edit to make changes.
- Click Submit.
- Click Print, if desired, then click Done
Still have questions? Download our complete user guide.
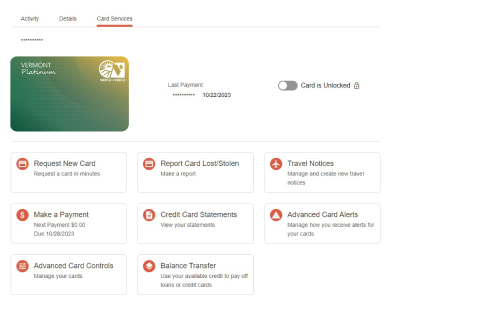
How to set card controls & alerts
Set credit card controls:
- Log in to Digital Banking and click on your card tile from the dashboard.
- Click Details & Settings.
- Click on the Card Profile. Note: The name of the primary owner of the card account will display in the card profile.
- Click Register under Card Preferences.
- Once you Register, you will have access to both Card Controls (i.e. Card Preferences) and Card Alerts. See below for information on how to manage card alerts.
- Click the toggle switch to lock your card. Click the switch again to unlock.
- The Card is Unlocked when the circle is to the right.
- The Card is Locked when the circle is to the left.
- Click the toggle switch to Block International In-Store Transactions. Click the switch again to unblock.
- Click the toggle switch to Enable Merchant Control.
- Select the merchant types you would like to allow.
- Click Save.
- Click the toggle switch to Enable Transaction Control.
- Select the transaction types you would like to allow.
- Click Save.
- Click the toggle switch to enable and set Spending Limits. You may choose one or both of the available spending limits.
- Click the Limit Per Transaction box and enter a Transaction Limit Amount.
- Click the Limit Per Month box and enter a Monthly Limit Amount.
- Click Save.
Still have questions? Download our complete user guide.
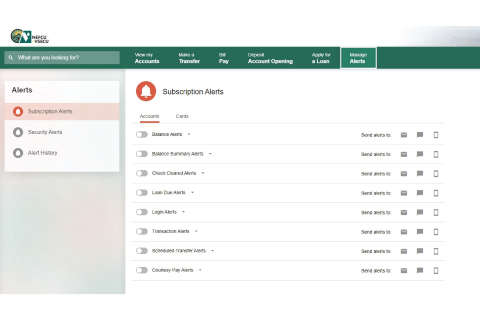
Manage card alerts:
- Log into Digital Banking and click Manage Alerts.
- From Subscription Alerts, click Cards.
- Click Register if you haven’t already registered while setting up Card Controls. Once you Register, you will have access to both Card Alerts and Card Controls (i.e. Card Preferences). See above for information on how to set card controls.
- Click the toggle switch to turn on Alert me when there are In-Store International Transactions. Click the toggle switch to turn off the alert.
- Click the toggle switch to turn on Alert me for these type(s) of merchant transactions.
- Click the switch again to turn off the alert.
- Select the type(s) of merchant transactions for which you would like an alert.
- Click Save.
- Click the toggle switch to turn on Alert me for these type(s) of transactions. Click the switch again to turn off the alert.
- Select the type(s) of transactions for which you would like an alert.
- Click Save.
- Click the toggle switch to turn on Alert me when I exceed the following spending limits: Click the switch again to turn off the alert. You may choose one or both of the available spending limits.
- Click the Limit Per Transaction box and enter a Transaction Limit Amount.
- Click the Limit Per Month box and enter a Monthly Limit Amount.
- Click Save.
Still have questions? Download our complete user guide.
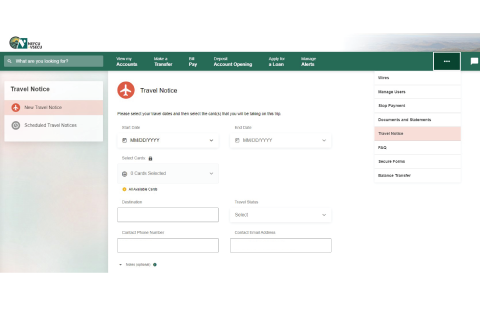
How to set a travel notice
- Log in to Digital Banking and click the three-dot ellipsis (…) to access More Links.
- From the More Links drop-down menu, click Travel Notice.
- This brings you to the Travel Notice details screen.
- Choose the card Account from the drop-down.
- Click the radio button for the type of travel: Domestic (Air Travel), Domestic (Road Travel), or International.
- Enter your Destination.
- Contact Phone Number and Contact Email Address are listed.
- Choose a Start Date and an End Date.
- Enter Notes (optional).
- Click Submit.
- Your travel notice for the selected card has been submitted. Click Add Another Travel Notice for additional cards.
Still have questions? Download our complete user guide.